• Welcome to Ecoboost Performance Forum. Please log in or sign up.
collapse

My Modded C3 Corvette

Started by BlackJac, January 27, 2015, 09:08:30 PM

Previous topic - Next topic

BlackJac

Here's the start of a build thread on my 1980 vette that I thought I'd share with you guys while I work towards modding my new 2015 XSport. I bought my vette back in 2001, put it on jack stands in 2002, and spend years acquiring upgraded parts and taking everything out except the back window, and rebuild it from the ground up the way I thought it should be. I finally got her back on the road again in 2010. It all started with a brake job, and while I'm at it... til' it was all apart. lol

Here's a couple photos from the beginning.


While the frame was out, I had to repair the body mount brackets.


I also went over all the welds, added gussets and boxed the front of the frame for extra strength. Then, I had the frame acid dipped, zinc phosphate washed, and powdercoated red.


Next, I started building the rolling chassis with Vette Brake Products "Top-of-the-line" Performance Plus suspension kit powdercoated red with front and rear fully adjustable dual mount monoleaf setup, offset trailing arms, full poly bushings, stainless steel brake lines, Bilstein Sport shocks, solid Spicer u-joints with machined u-joint caps, o-ring seal/stainless steel sleeved 4-piston calipers all around, rebuilt 3.70 Dana 44 rear, to name a few parts.


Thanks for looking. More to come.
Mike
2017 Fusion Sport - 401A/ Moonroof/ Magnetic Grey/ Livernois Motorsports 93 Stage 3

2015 Explorer Sport  - SOLD

Modded 1980 Corvette https://www.youtube.com/watch?v=4SUDndpy8bw

J-Will

2014 Factory Order SHO (non pp) Deep Impact Blue
Gearhead Automotive Performance Tune
3-bar
SP-542 plugs w/ GH gap

SHOnUup

Awesome build!!!

Can't wait to see the finished product. :D:D:D:D:D

Rich

2011 Sterling Gray Metallic SHO non PP,
12.4211 @ 110.28 Livernois 3bar tune & CAI,
Added since...PPE catless Dpipes, Megan coilovers, Powergrid adjustable end links, and EBC slotted rotors and red stuff pads.
Tommy Designs grille with carbon fiber hydrographics, fender badges and fog bezels hydrodipped also, tinted windows, head & taillights, debadged trunk with all chrome plasti-dipped, black calipers, obdlink mx scantool running torque pro on 7" tablet.

Frozen Taurus

2011 Tuxedo Black SHO non PP, K&N drop in, TCE Big Brake Kit, Megan Racing Coilovers
My other car is a 447 awhp Talon

SHOdded

Lotta care right there!  Keep 'em coming!
2007 Ford Edge SEL, Powerstop F/R Brake Kit, TXT LED 6000K Lo & Hi Beams, W16W LED Reverse Bulbs, 3BSpec 2.5w Map Lights, 5W Cree rear dome lights, 5W Cree cargo light, DTBL LED Taillights

If tuned:  Take note of the strategy code as you return to stock (including 3 bar MAP to 2 bar MAP) -> take car in & get it serviced -> check strategy code when you get car back -> have tuner update your tune if the strategy code has changed -> reload tune -> ENJOY!

BlackJac

#5
Thanks Guys! Here's some more.

My brother built a 350 bored .40 over and stroked to 385 ci with World Products heads for his 80' Z28, but he had a change of plans and sold me the engine with about 500 miles on it. So, in it went.

I originally was going with a Tuned Port Injection setup I had, but found out it wouldn't feed this engine enough fuel (Anybody looking for a TPI setup? lol), so ended switching to an Edelbrock intake and BG Speed Demon 750 carb. I also converted it to a serpentine belt setup used from an 89' Firebird. I used the original super T10 4 speed with a new clutch setup and Hurst shifter.

Serpentine setup bought off eBay for $100.


TPI setup sitting on the engine. Added March pulleys and new accessories.


Switched to the intake and carb.
2017 Fusion Sport - 401A/ Moonroof/ Magnetic Grey/ Livernois Motorsports 93 Stage 3

2015 Explorer Sport  - SOLD

Modded 1980 Corvette https://www.youtube.com/watch?v=4SUDndpy8bw

BlackJac

The fiberglass corvette body is attached to a steel structure around the passenger compartment which is called the "birdcage". 4 of the body mounts that needed repairs due to rust on the frame attach to the rocker area of the birdcage on the A and B pillar locations, which were rusted on the birdcage also. So i bought 3 piece rocker channel inserts for both sides and cut out the bottom or the rocker channels in both A and B pillars, pushed the inserts up into them and installed the lower center rocker channel piece. I welded everything in place so now the lower half of the birdcage has double the steel and is more rigid. I also cleaned all the steel up on the bridcage and painted it with POR15.

A few pics before welding in all the pieces.

A pillar


B pillar


Lower rocker channel
2017 Fusion Sport - 401A/ Moonroof/ Magnetic Grey/ Livernois Motorsports 93 Stage 3

2015 Explorer Sport  - SOLD

Modded 1980 Corvette https://www.youtube.com/watch?v=4SUDndpy8bw

EcoPowerParts

Mike B | info@ecopowerparts.com
www.ecopowerparts.com -
please use my website for any price quotes and to submit any orders.
Please email me via info@ecopowerparts.com if you have any questions on new or existing orders, PM's via the forum are hard to track your purchase as I can't relate user name to actual name.
https://www.facebook.com/ecopowerparts

mval

keep them pics coming, great build hope you plan to keep her, from the guys at auctions that i attend that i talk to very few people get out all the $$ they put in a project like this much less any pay for the time. it just a labor of love.
'10 lme 4+93, 160t, 3 bar, w/cust headrest & evo gauge pod,md design cai, ppe dpes, borla cback , vertini 20" cust wheels w/conti dws, ebc slotted rotors w/red pads & mgp caliper covers, viper remote start, cust dipped eng cover,fascia, cai & lids,decals, custom bra, black wrapped spoiler
2017 chally scat pack shaker yellow jacket dd, so sho can be a show queen

BlackJac

Thanks for the nice comments!

The vette is not going anywhere. lol I have it sitting on my KwikLift in the garage. I know I dumped a ton of money and labor into it, but consider it more of a hobby, not an investment. It will probably end up going to my daughter who is only 3 years old now, but loves going for rides in it. Who knows, might even be worth a lot of money by then.

So to continue some more, I cleaned up the engine bay, underbody, repaired some cracks in the fibergalss body from underneath, and painted with satin black.


I also thermal insulated the full interior using a very lightweight material, and double layers for the floorpan.


I upgraded the main wire harness from the battery to the engine bay with a heavier gauge.


Made new fuel lines, stainless steel clips for the fuel and brake lines, new Van Steel haft shafts for the rear, and new fuel tank.


Since I originally was going with fuel injection, I had installed an electric fuel pump with pre and post fuel filters.


Next, installed the body back onto the frame. Here I was test fitting the new C6 Z06 style 17" x 9.5" wheels to figure out that I needed 2.5" wheel adapters to fit them in without clearance issues. The wheels are powdercoated black with red banding and the tires are Nitto NT555 Extreme 275/40 ZR17 all around. Now it's starting to look like a car again!


Also installed Headman 1 5/8" headers with stock style 69' Corvette sidepipes. I put the original doeskin color interior back in after a re-dye, and changed to a 2-tone theme using new black carpeting (I still need to do the door panels and seats). Here the wheels are installed after receiving the wheel adapters.


2017 Fusion Sport - 401A/ Moonroof/ Magnetic Grey/ Livernois Motorsports 93 Stage 3

2015 Explorer Sport  - SOLD

Modded 1980 Corvette https://www.youtube.com/watch?v=4SUDndpy8bw

SHOnUup

Great build. Looks like that could've been real fun.

Is that Mustang I saw parked in the video up on the hoist yet? ;)

Rich

2011 Sterling Gray Metallic SHO non PP,
12.4211 @ 110.28 Livernois 3bar tune & CAI,
Added since...PPE catless Dpipes, Megan coilovers, Powergrid adjustable end links, and EBC slotted rotors and red stuff pads.
Tommy Designs grille with carbon fiber hydrographics, fender badges and fog bezels hydrodipped also, tinted windows, head & taillights, debadged trunk with all chrome plasti-dipped, black calipers, obdlink mx scantool running torque pro on 7" tablet.

BlackJac

It's my wife's 68' Mustang coupe 302 auto. She got it from her father in 1986 and it was still her daily driver when I met her in 2000. It's been sitting since 2001 and needs a full restore.
2017 Fusion Sport - 401A/ Moonroof/ Magnetic Grey/ Livernois Motorsports 93 Stage 3

2015 Explorer Sport  - SOLD

Modded 1980 Corvette https://www.youtube.com/watch?v=4SUDndpy8bw

PokerMunkee

Very cool, thanks for sharing!

I wish I could find time to do stuff like this.  As others know, I don't even have time to put on my Corsa exhaust that's been sitting in my garage since June. :(
2013 SHO PP - Ignot Silver/Charcoal
Unleashed 91 tune w/ 3BAR, Corsa exhaust, LEDs everywhere
2011 F-250 6.2 CCSB FX4

BlackJac

No problem. Glad you guys enjoy this build!

Here are a couple pictures of when I finished getting my vette back on the road. I added a couple Grand Sport stripes in Laser Red to each side.


2017 Fusion Sport - 401A/ Moonroof/ Magnetic Grey/ Livernois Motorsports 93 Stage 3

2015 Explorer Sport  - SOLD

Modded 1980 Corvette https://www.youtube.com/watch?v=4SUDndpy8bw

BlackJac

#14
Next I moved on to upgrading the transmission. I did a ton of research to complete this conversion. I also created a trans swap thread on 3 popular corvette forums to share my work, and have over 40,000 views between them. I also received tons of comments and questions for information on taking on this conversion. There are a few different ways to go with the install, but this is the route I took with it.

Summer 2011 I picked up a T56 trans out of a 94' Trans Am that a guy was parting out. So I finally decided to go for the install and removed my old trans and clutch linkages and sold them. I kept my Centerforce dual friction clutch and Fidanza aluminum flywheel. I picked up a conversion kit from Weir Hot Rod Products to convert the trans from a pull type clutch to a push, so I can use my current clutch and flywheel. The kit comes with the following:

LT1 T56 Kit (converting the pull clutch to a more conventional push design)
356 T6 Cast Aluminum Heat Treated Bellhousing
Self Adjusting Hydraulic Release Bearing Assemble (which is rebuildable)
Steel Block Plate
Pressure Tubing
All Necessary Bolts
Master Cylinder
Clutch Line


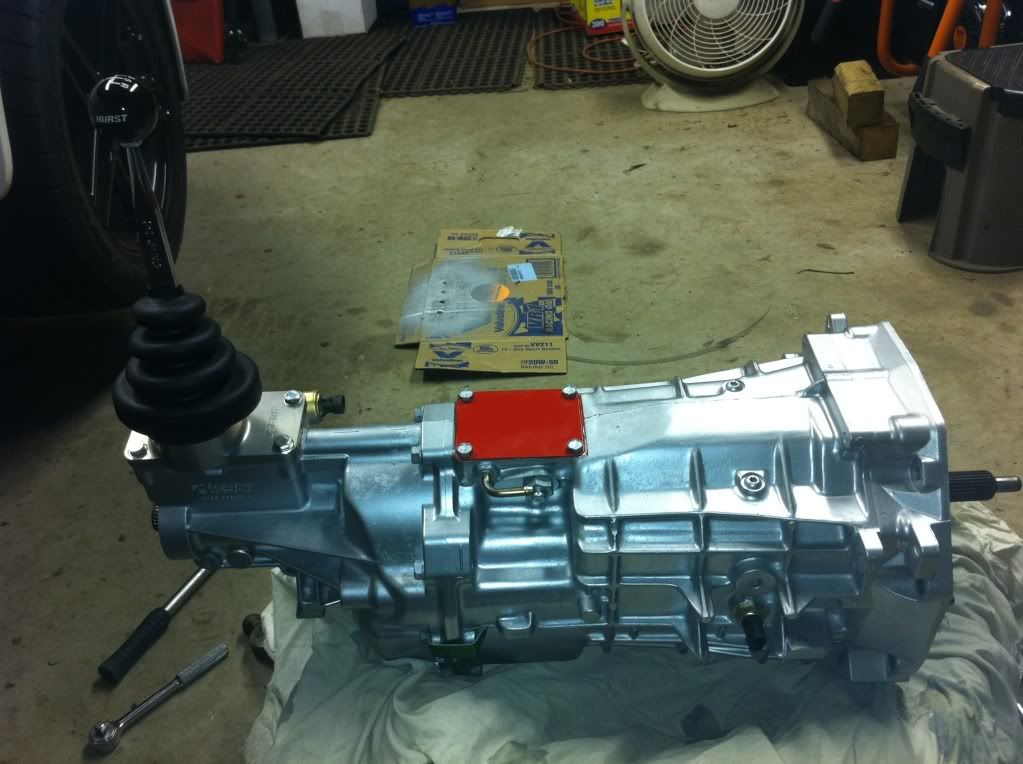
Cleaned up the trans and picked up a Hurst Billet Plus Shifter.


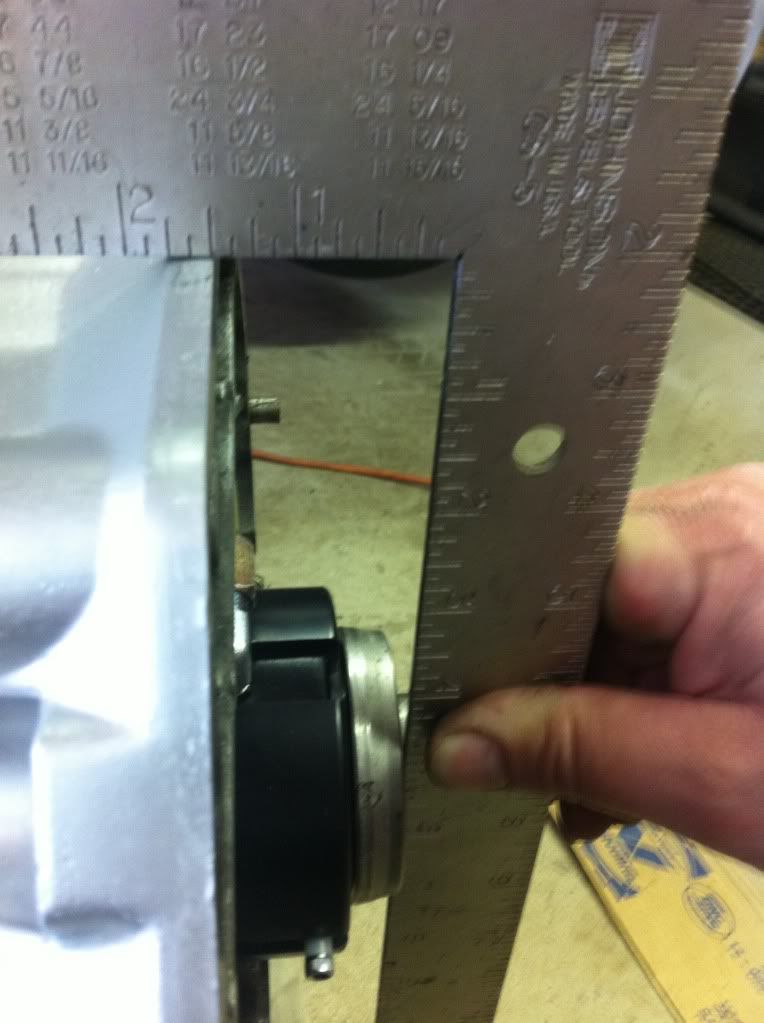
I checked to make sure the clearance for my hydraulic throw-out bearing was going to be within specs, 1/8" give or take a 1/32. I started out by bolting the block plate, flywheel, clutch disk, pressure plate, and bellhousing to the engine. I put a straight edge across the bellhousing to trans surface and used a tape measure to measure the distance from the clutch fingers to the straight edge which gave me 1 1/2".
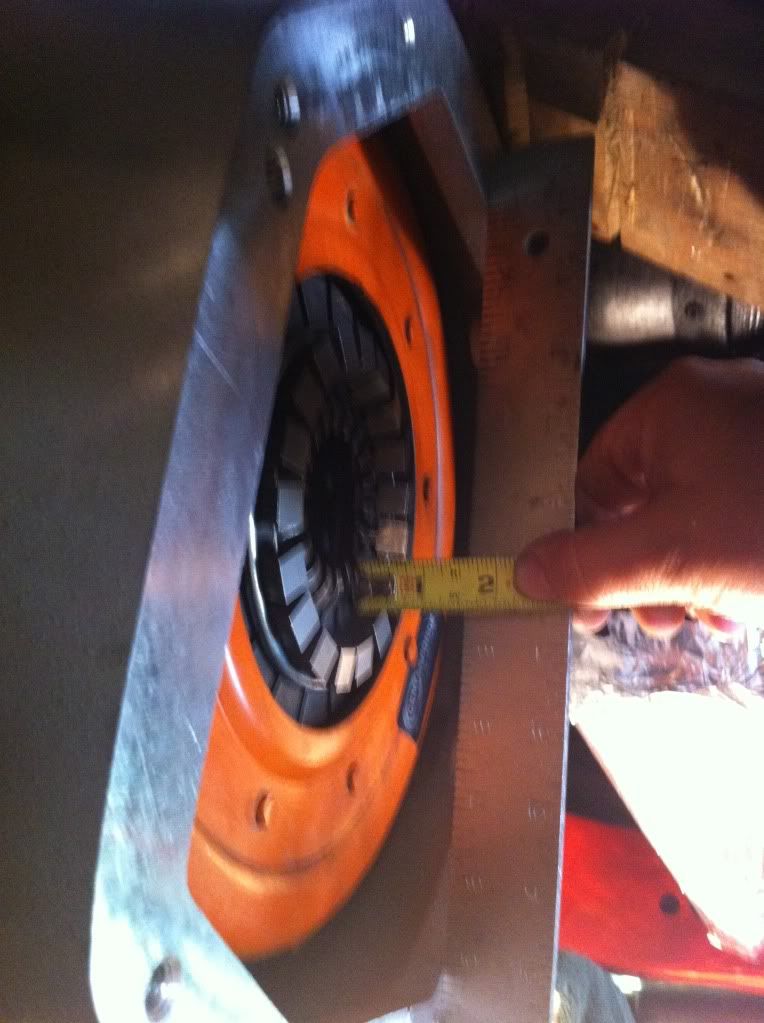


Then I installed the hydraulic throw-out bearing to the trans and used a straight edge again to measure the distance from the bearing face to the trans to bellhousing surface, which gave me 1 3/8". According to my measurements, subtract the two, I have 1/8" clearance between my throw-out bearing and clutch fingers which is right in specs.


I insulated the tunnel to cut down on heat.
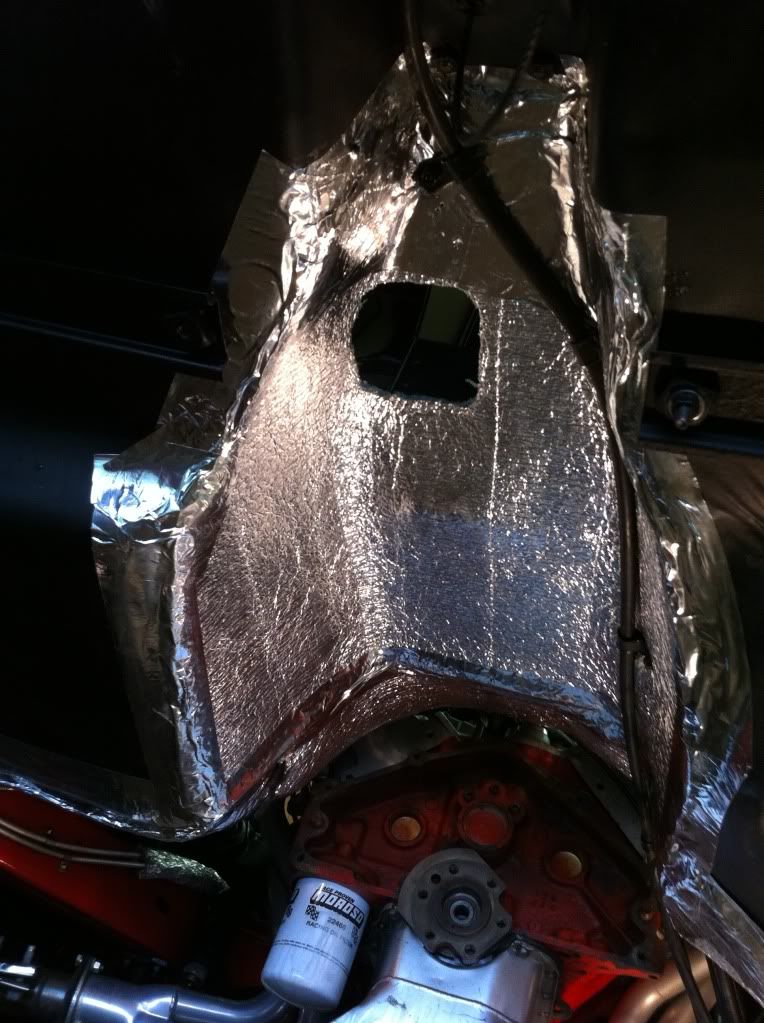


I relocated the battery cable so it is out of the way of the new shifter location and trimmed the tunnel up.


I made a removable cover for the tunnel with a neoprene seal on one side and insulation on the other.


Bought a driveshaft from an 82' vette, has the correct yoke that I need and had it shortened 1", installed solid Spicer U-Joints, and balanced. Now 24" from center u-joint to center u-joint.


I needed an angle adapter for the firewall to clutch master. I received this generous donation from Keisler.
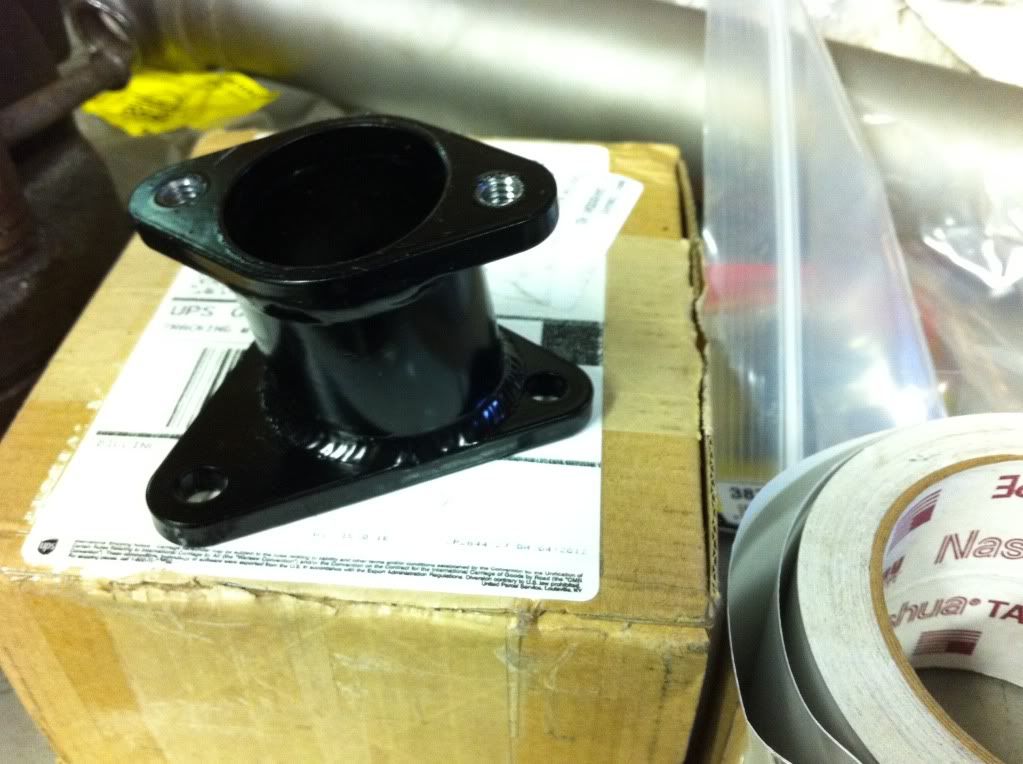


I used a rod end and bolt coupler for the clutch pedal connection.


Installed the clutch master with remote reservoir.


Bolted up the trans.


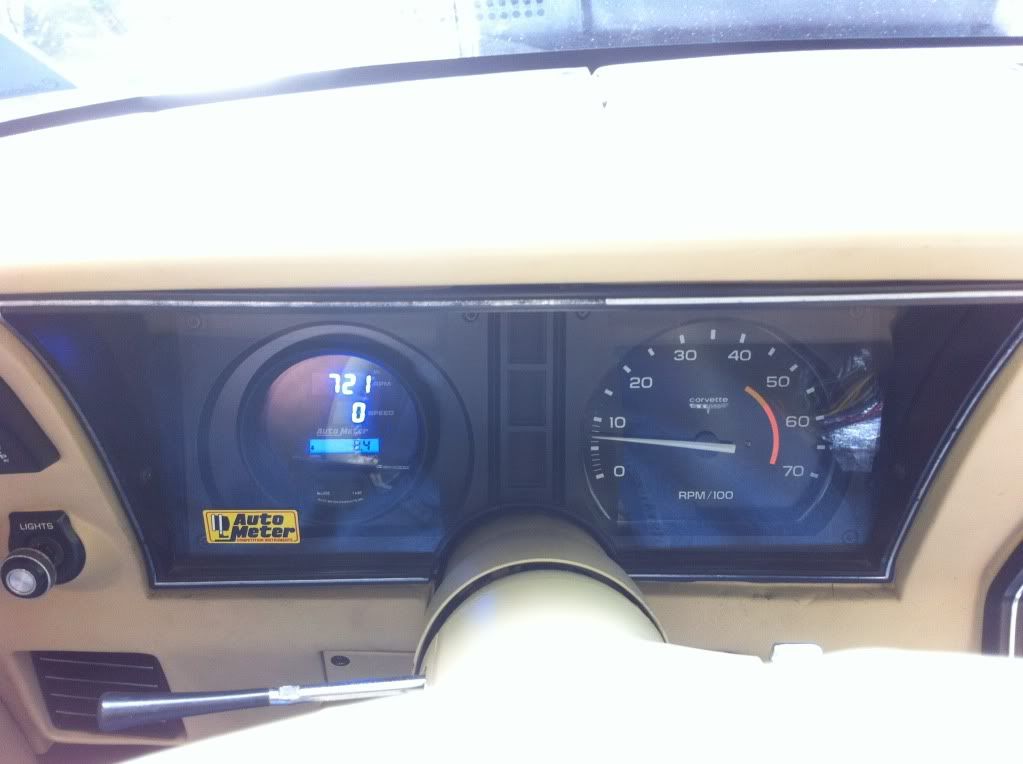
Since the new trans uses an electronic speedometer, I made a filler plate and installed this 3 3/8" Autometer Digital Speedometer/ Tachommeter Combo.
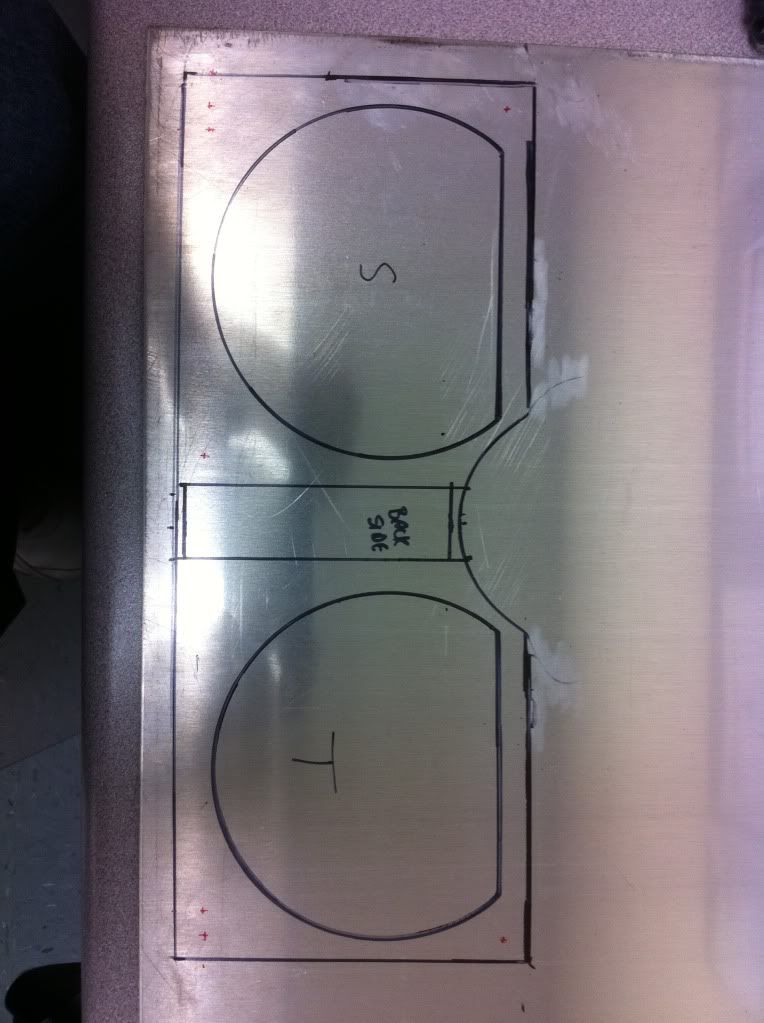
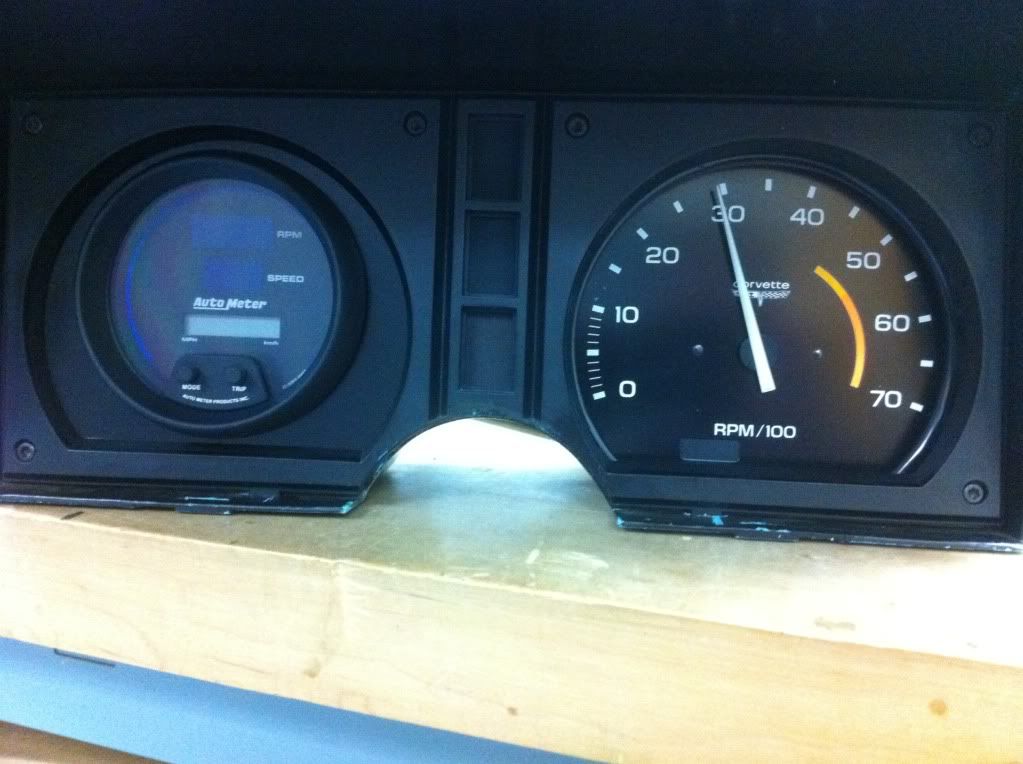


Also, I picked up all the electrical plugs I needed for the trans speedometer, reverse lockout, and backup lights from ebay.

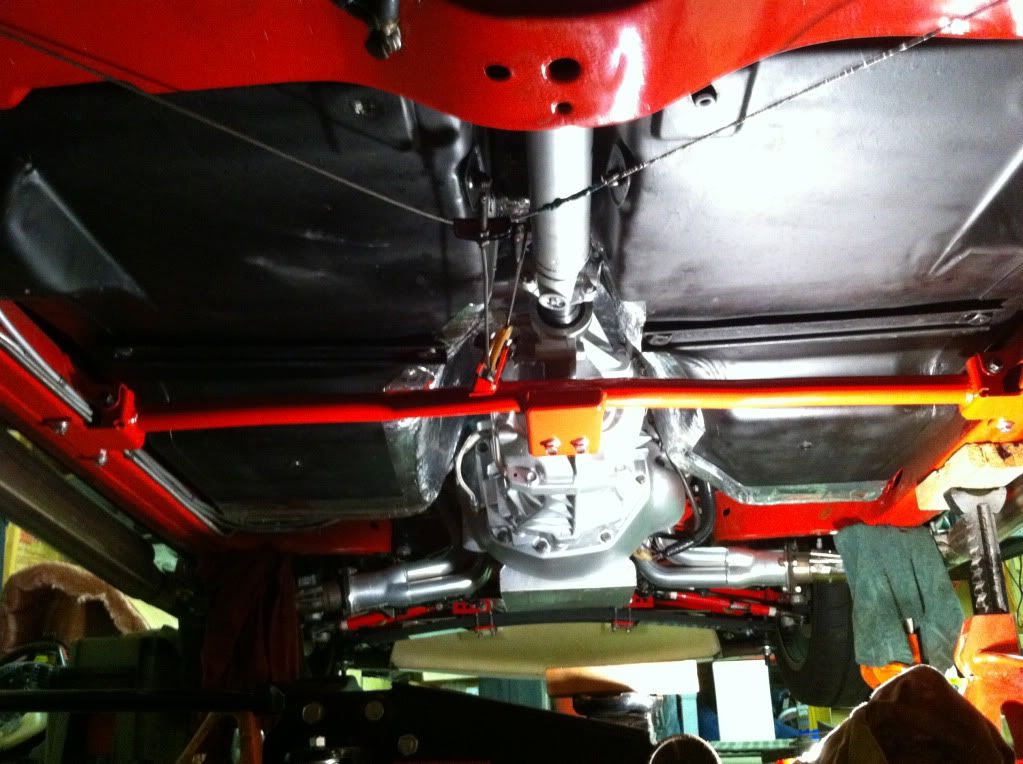
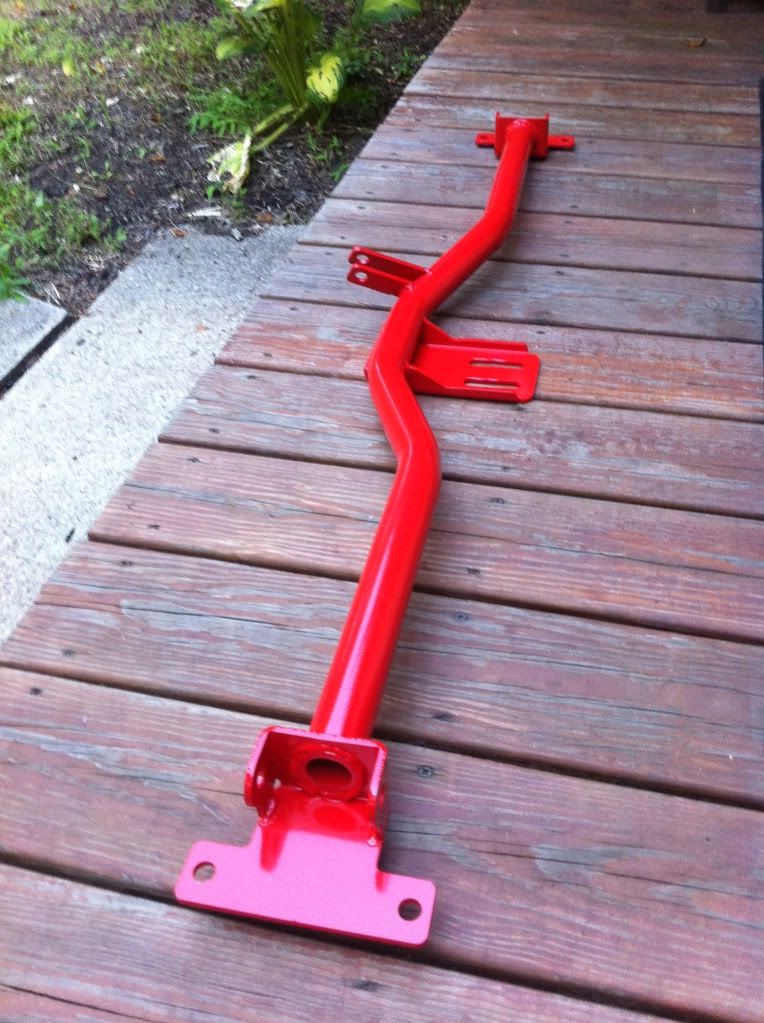
Here's a pic of the replacement BowTie Overdrives crossmember powdercoated Flame Red, the same color as my chassis.


Here's a couple pics of the undercarriage.
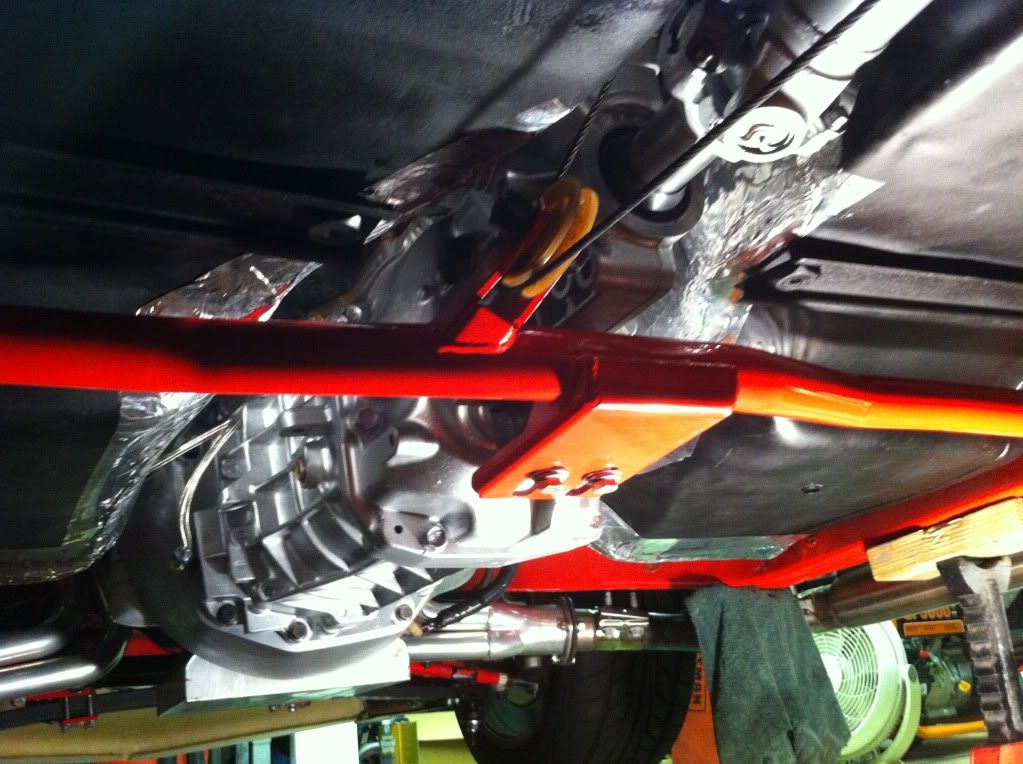


I had to shorten the emergency brake cable because the new crossmember positioned the cable pulley back further which added to much slack for adjustment.

Here is how to wire up the transmission sensors:

With OEM GM connectors;

Reverse Lockout
Pink - +12V (wired to power on with the brake lights at the brake pedal switch)
Green - Ground

Backup Lights (connected to the stock wiring to my 4 speed)
Green to Ignition +12V (stock blue wire)
Brown to Backup Lights (stock green wire)

VSS
Purple - Speedometer Signal
Green/Black - Ground

I took my truck out and marked off 2 miles from my house to calibrate the new speedometer in the vette. I took out the vette, calibrated the speedometer, and headed for the highway. The biggest things that I noticed the most was how much smoother shifting was. Definitely much better! Also with the stock trans in 4th gear at 60 mph my vette was at a very loud 3100 rpm. Now in 6th gear at 60 mph my vette is at a mellow 1550 rpm! This is just so much better than before.

A pic of the Autometer Digital Speedometer/ Tachometer installed.


Modified the shifter so it comes up through the stock console position. Here's a few pics.


A pic with the finishing touch of the shift pattern plate installed. My 6 speed swap is officially complete!


Here's some before and after pics of when I cleaned up the trans.

Before:
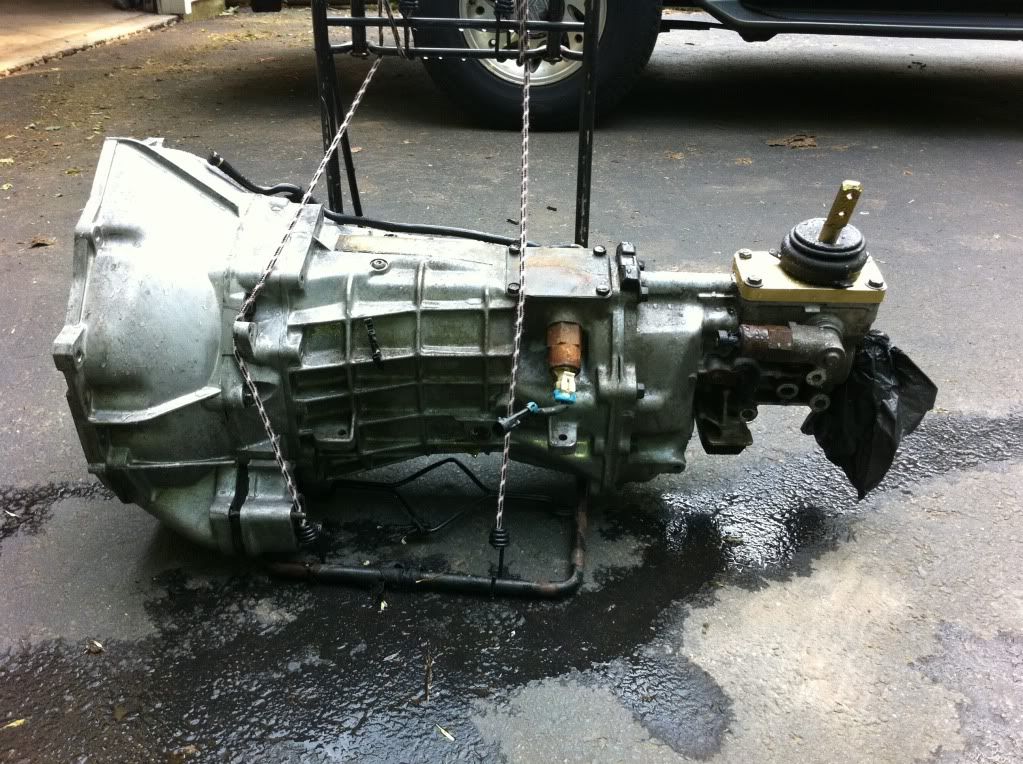


After:


Also, here's a couple pics of the stock T56 bellhousing (left side) next to the upgraded bellhousing (right side) that I installed.


2017 Fusion Sport - 401A/ Moonroof/ Magnetic Grey/ Livernois Motorsports 93 Stage 3

2015 Explorer Sport  - SOLD

Modded 1980 Corvette https://www.youtube.com/watch?v=4SUDndpy8bw