• Welcome to Ecoboost Performance Forum. Please log in or sign up.
collapse

"How To" Spray tint your own tail lights

Started by bee615, October 16, 2014, 09:47:37 AM

Previous topic - Next topic

bee615

Hey everyone,

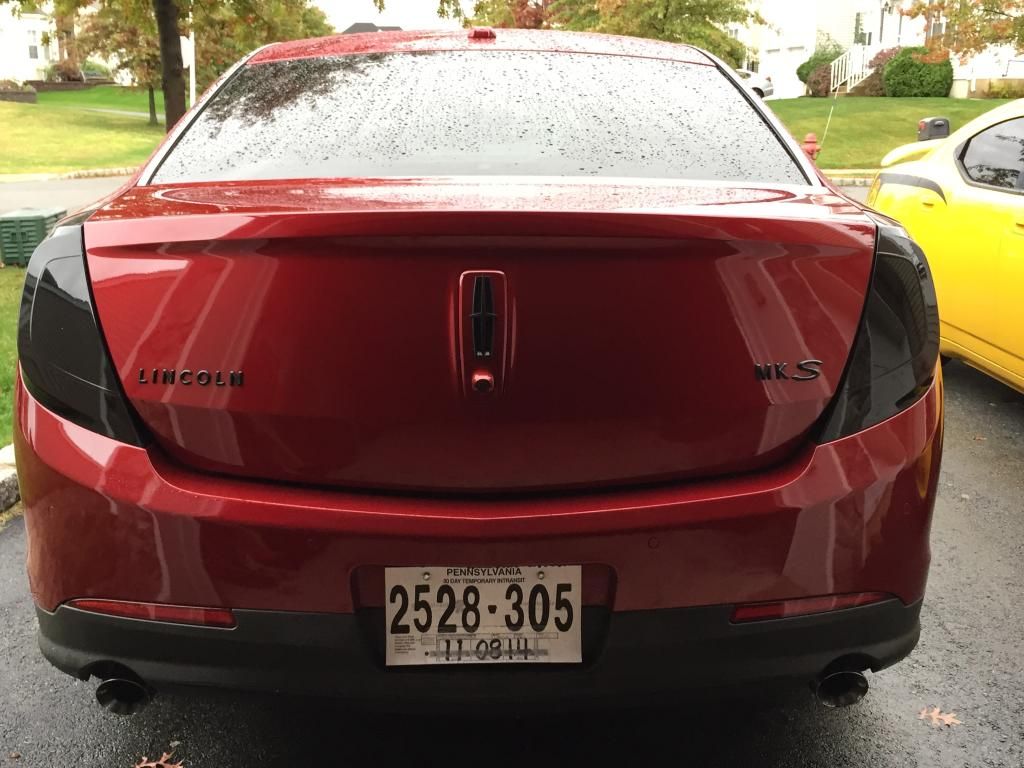
Thought I would share yesterday's project with you.  After getting the windows tinted on the MKS the other day I figured I would go ahead and tint the tail lights.  This is about the 6th set I've done over the last few months so I think I've got it pretty much down to a science. If you follow my method you will achieve a very glossy finish that can be easily maintained with your favorite polish and wax.

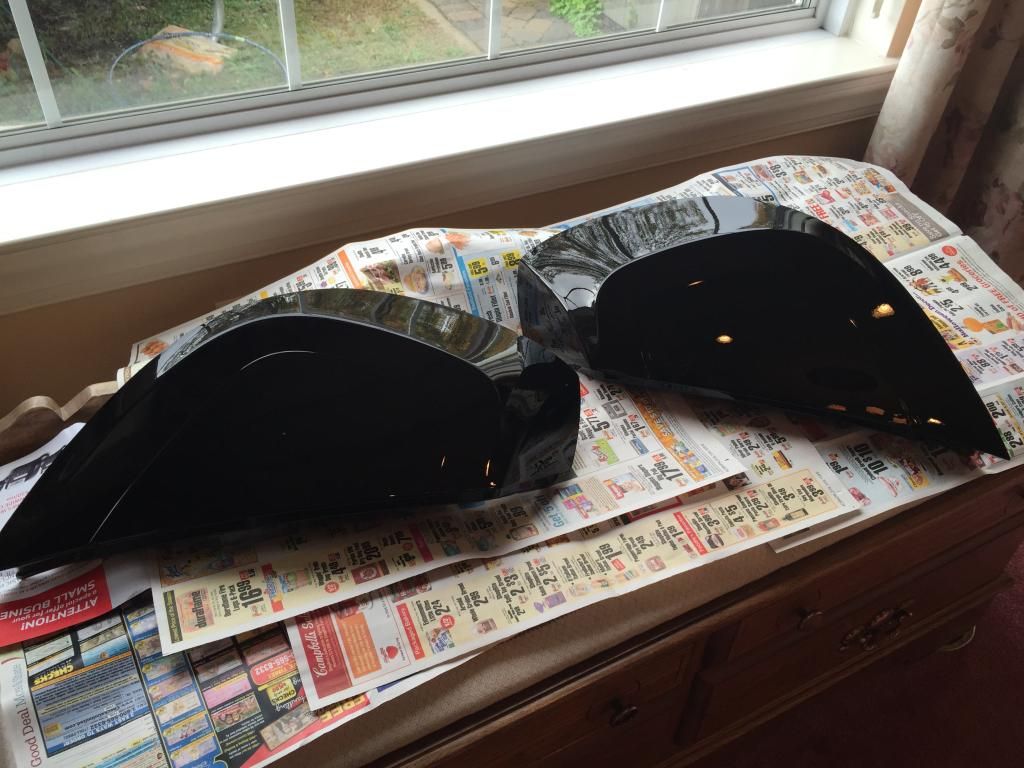
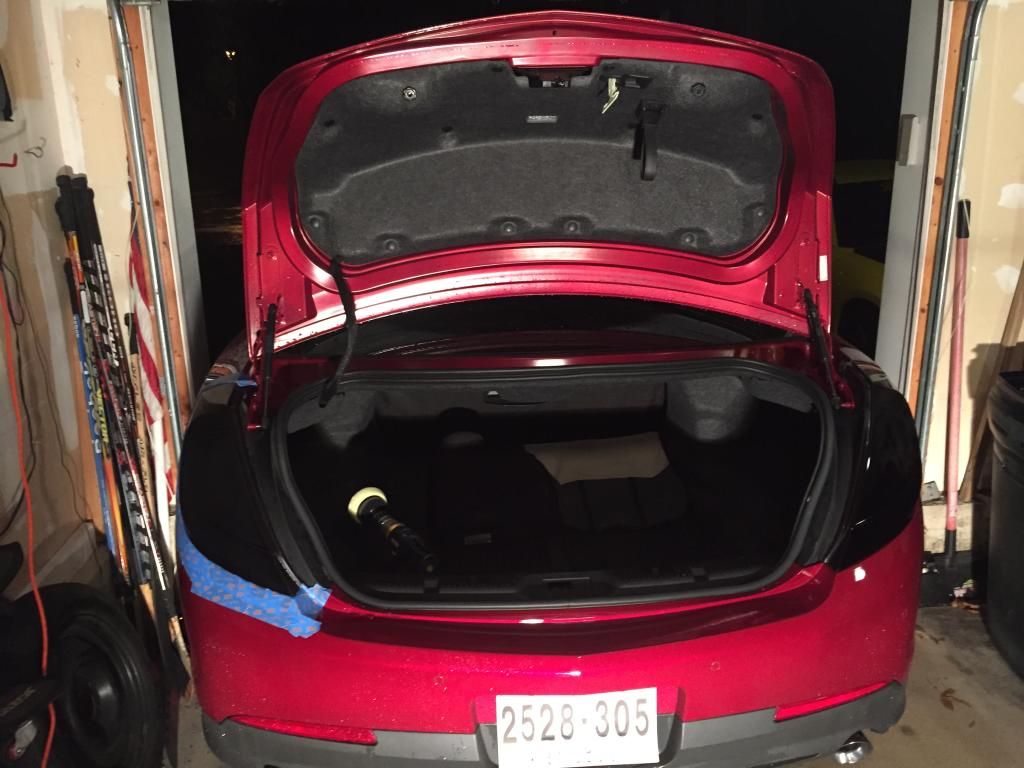
Step 1 - Remove tail lights.  Be careful not to scratch the bumper while removing, I generally add a few rows of blue tape just under the lights to be safe.

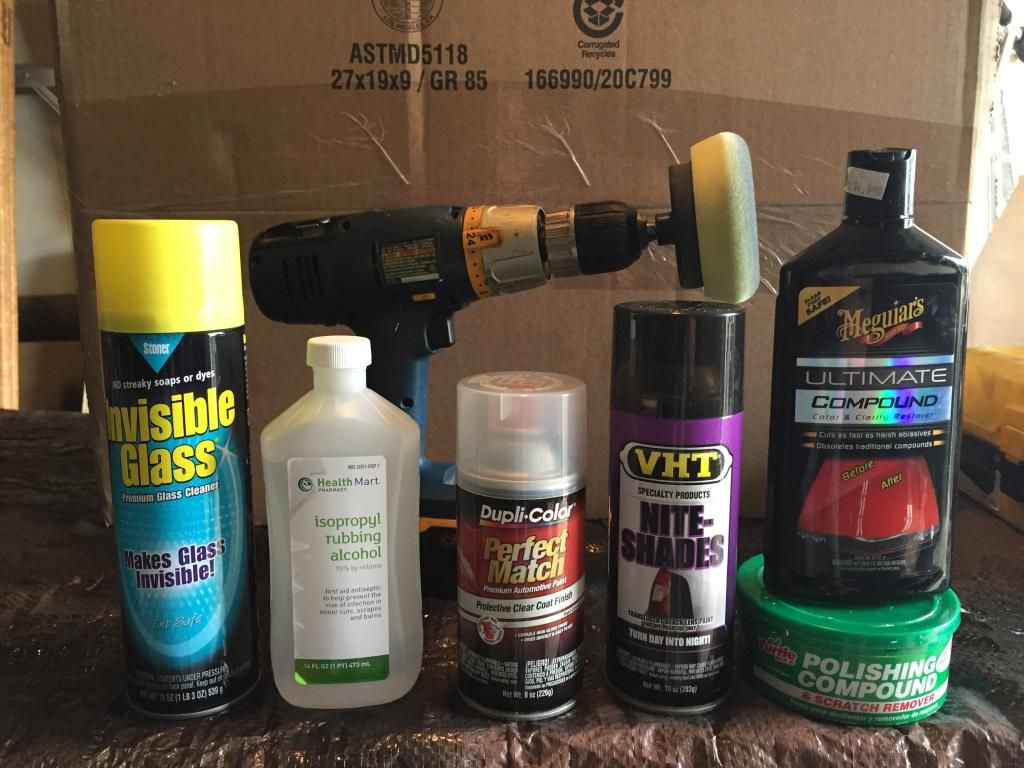
Step 2 - Ready your supplies.  Here is a pic of what I use.  Not shown are 1000 and 2000 grit wet sandpaper, a bucket of warm soapy water, and plenty of soft microfiber towels.  Make sure to get a clear coat that is sand-able!  The first time I did this project I used a Rustloeum product that wasn't and I had to sand the entire lens back down and start from scratch, not fun.


Step 3 - Soak the 1000 sandpaper grit in the soapy water for about 10 mins.  Lightly sand the lights using light pressure and long strokes, keeping the surface wet at all times.  You are just looking to knock the gloss off the lens.


Step 4 - Take a microfiber cloth and moisten with the rubbing alcohol.  Clean the surface of the lens and let dry.  I use a small leaf blower to make sure I get all the water out of all the little crevices.

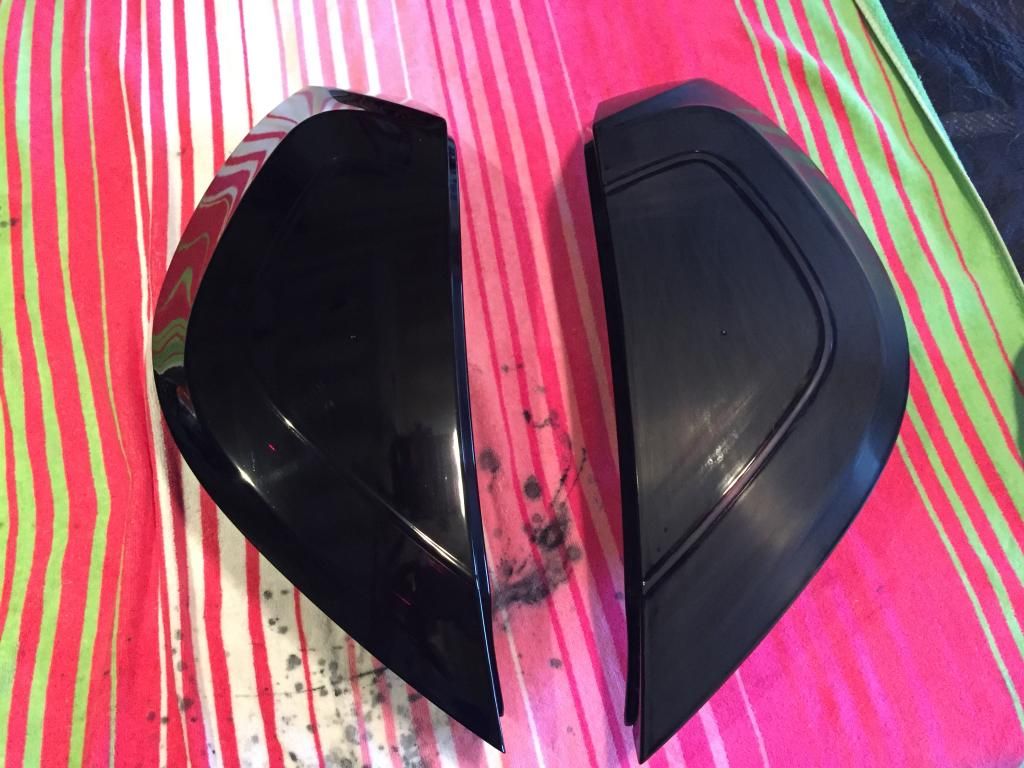
Step 5 - Now its time to spray on the tint.  I generally use 4 coats which makes it look pretty dark but the lights still shine through just fine.  The first coat should be light, followed by 3 wet coats allowing about 10 mins in between.  Once you have all the coats applied put them in a nice warm place for about 3 hours to dry.  Here is what they look like with just the VHT.  They will be shiny but not super reflective because of the orange peel.


Step 6 - Once the tint is dried you can know prep the surface for clear coat.  Take your 1000 grit paper again and lightly sand the lenses using light pressure and keeping the paper wet at all times.  You are not looking to remove a lot of material here, just trying to knock out the orange peel.  Once the surface has a nice uniform grey haze to it your ready to go.  Be careful on the contoured areas to not sand too much cause you could go through the color.


Step 7 - Clean the lenses with alcohol before applying the clear coat.  I generally go with 5 coats, with the first coat again being very light.  Once complete allow to dry another 2-3 hours in a warm place.  Here they are, not super reflective but they will be soon.


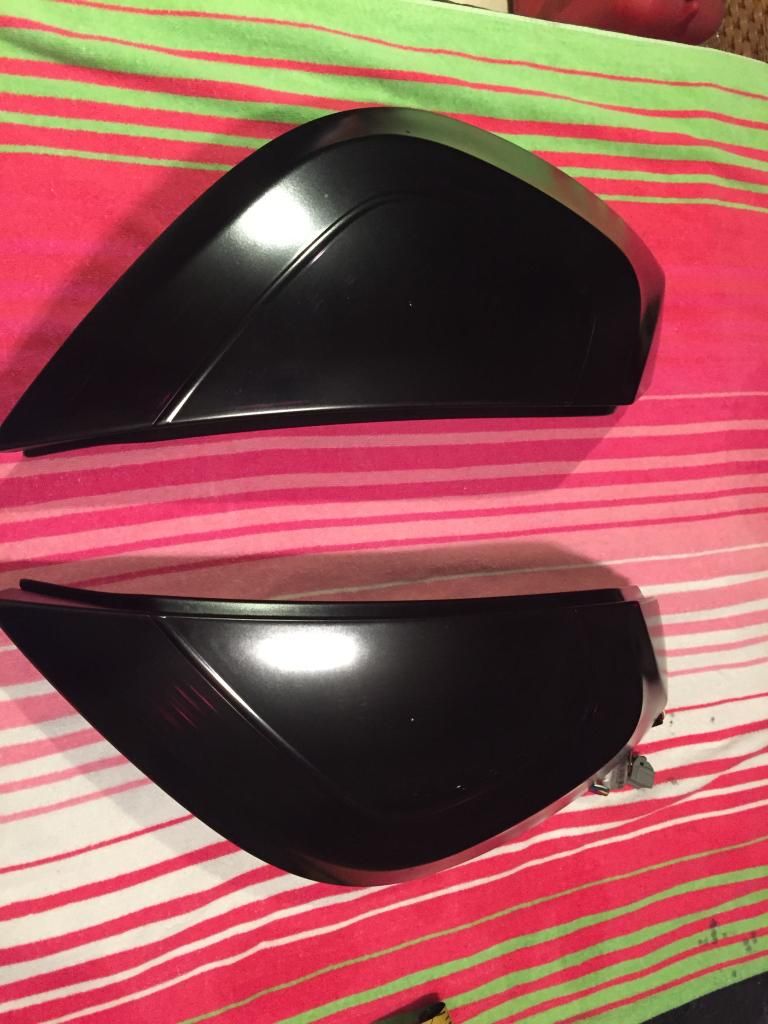
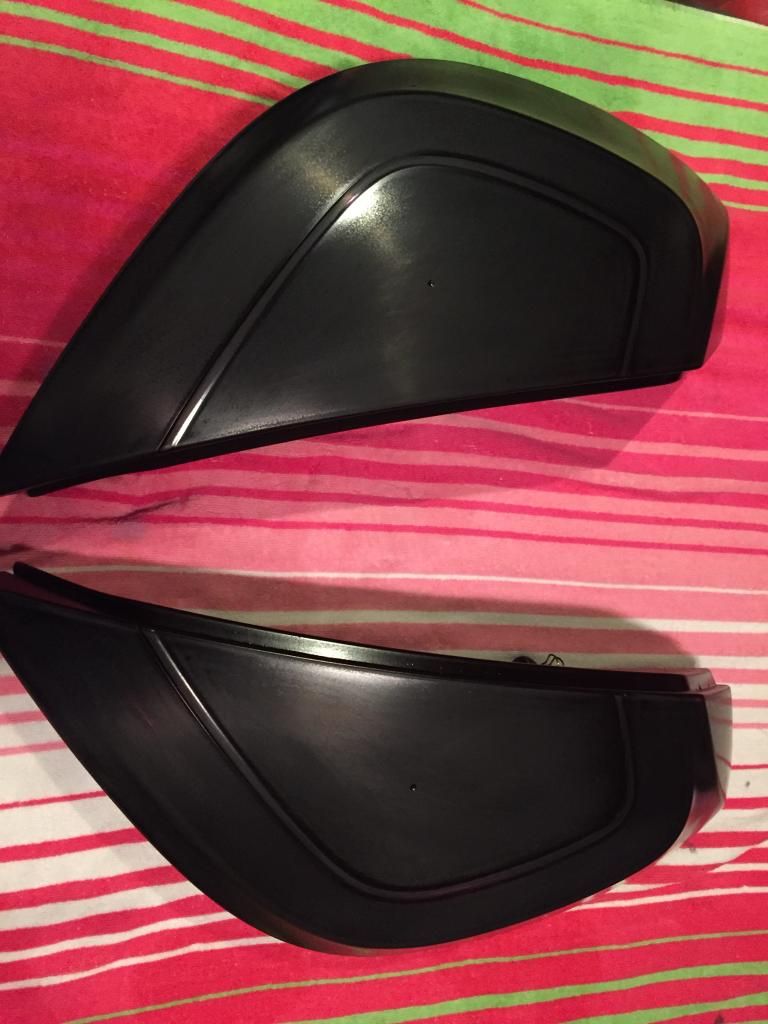
Step 8 - Lightly sand the lenses with the 2000 grit paper.  Again, just trying to knock out the orange peel.  Be careful on the contoured areas not to sand too much as you could go all the way through the clear.


Step 9 - If you have someone to help hold the lenses for this next step, leave them off the car.  If not, you can re-install the lights but make sure to mask off the areas around the edges.  You don't want to damage the car's paint during the buffing process.


Step 10 - Using the Turtle Wax compound (green can) and your drill with 2" foam pad, start to buff.  I generally start on a pretty low speed just to work in the compound.  Once the compound has started to break down you can then increase the speed of the drill, work until the compound is almost dry.  Remove the residual with a micro fiber cloth and some detail spray.  At this point you will still see some minor scratches and some haziness.

Step 11 - Using the Mequire's Ultimate Compound and a fresh 2" foam pad, follow the same process.  I generally like to do this 2x per lens, removing the residual compound in between.  Don't be afraid to use a fairly high speed on the drill and decent pressure.  You are looking to build up a little heat in the pad which helps the process.

Step 12 - Apply a coat of your favorite wax. 

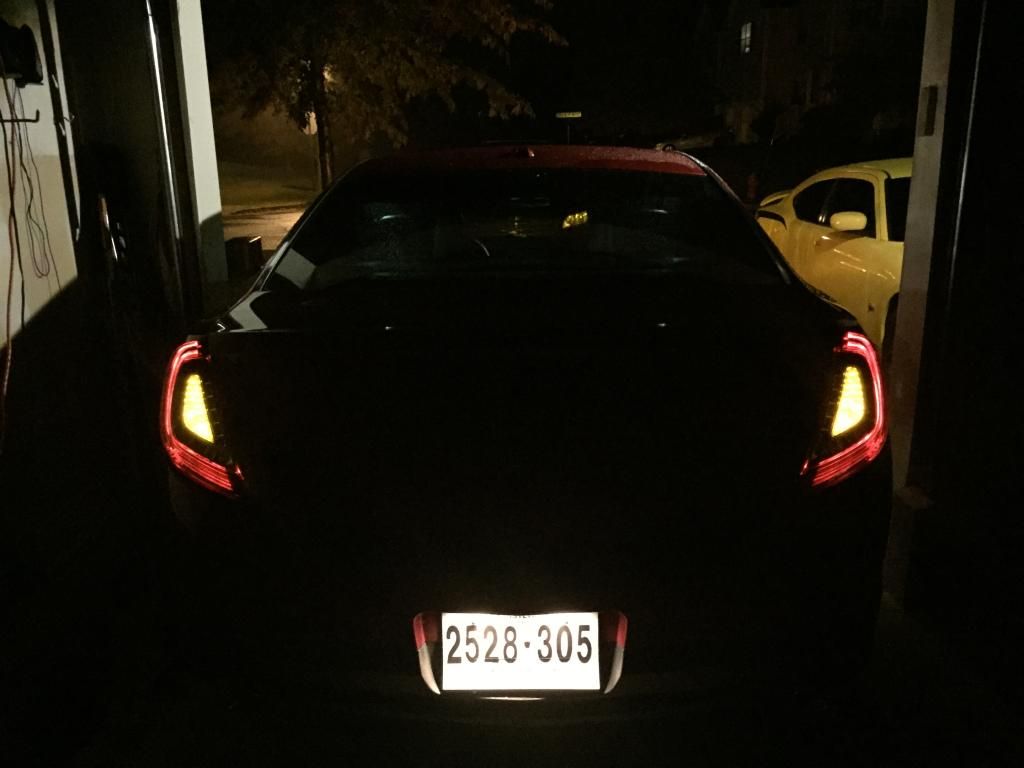
Here is the finished product.  It's an all day project with the dry time involved but actual working time is maybe 2 hours. 


2017 Lincoln MKZ 3.0 TT AWD
2017 Dodge Hellcat Charger - 825 rwhp
(SOLD) 2013 Lincoln MKS AWD w/Ecoboost - Airaid, Livernois Catted Downpipes, Magnaflow catback, 3 bar MAP, SCT Livewire TS, Unleashed tune, TSW wheels

SHOnUup

2011 Sterling Gray Metallic SHO non PP,
12.4211 @ 110.28 Livernois 3bar tune & CAI,
Added since...PPE catless Dpipes, Megan coilovers, Powergrid adjustable end links, and EBC slotted rotors and red stuff pads.
Tommy Designs grille with carbon fiber hydrographics, fender badges and fog bezels hydrodipped also, tinted windows, head & taillights, debadged trunk with all chrome plasti-dipped, black calipers, obdlink mx scantool running torque pro on 7" tablet.

peppelepugh

Might as well chalk this one up with the rearranging trunk badges as a winter project.... GREAT WRITE-UP!!!!
2011 Kona Blue SHO non-PP: MDesign Carbon Fiber CAI, All interior lights LEDs, LED Puddles, and LED Reverse.

EBC Stage 4 Brake kit, 170* T-stat, 3-Bar MAP, NGK Plugs, PPE Catless-DPs and Tune by Torrie!

SHOdded

2007 Ford Edge SEL, Powerstop F/R Brake Kit, TXT LED 6000K Lo & Hi Beams, W16W LED Reverse Bulbs, 3BSpec 2.5w Map Lights, 5W Cree rear dome lights, 5W Cree cargo light, DTBL LED Taillights

If tuned:  Take note of the strategy code as you return to stock (including 3 bar MAP to 2 bar MAP) -> take car in & get it serviced -> check strategy code when you get car back -> have tuner update your tune if the strategy code has changed -> reload tune -> ENJOY!

Airbornemaikai

Hmm. Ok so I did a similar procedure to my front ambers on my explorer. I applied 3 coats of vht and a clear coat. The other day I went out to clean my headlights as I was going to just put my overlays over top of the already tinted ambers, as I started to clean the lights with rubbing alcohol ( I had 90%) it completely removed the niteshades tint as if it were just permanent marker. I am still baffled about this. What really sucks is because I was not expecting this at all I wasn't paying much attention and smeared the paint onto my gorgeous white paint... Now its discolored and I'll be having to hopefully just buff it out to remove it.
Anyway idk what to think. Im curious to know how you applied your 3 coats and then were able to clean it with the rubbing alcohol again before applying the clear coat, maybe the alcohol content?
Oh and I had done this before this write up so I'm not saying its the OPs fault or anything like that, just saw the thread and thought I would chime in.
2014 Explorer Sport
LMS 91 Tune with 3 Bar Map
160º Evenflo T-stat, 0.30 Motorcraft plugs
LMS DP W/HI-Flow Cats, LMS Corsa Cat-Back
Airaid 401-260

SHOdded

Interesting point, sorry to hear about the paint issue!  bee used 70%, but I see on the 'net that others have used higher concentrations like you did to remove the tint.  Better than using gasoline though.

This is the MSDS for Nite Shades.  Hope someone familiar with the chemistry will chime in, but it looks like essentially the chrome is deposited on top of the part sprayed with Nite Shades.  The bond is weakened/broken by the IPA because of sufficient acidity at 90% concentration.

Blurb about IPA from wikipedia:

Automotive[edit]

Isopropyl alcohol is a major ingredient in "gas dryer" fuel additives. In significant quantities, water is a problem in fuel tanks, as it separates from the gasoline, and can freeze in the supply lines at cold temperatures. Alcohol does not remove water from gasoline; rather, the alcohol solubilizes water in gasoline. Once soluble, water does not pose the same risk as insoluble water, as it will no longer accumulate in the supply lines and freeze. Isopropyl alcohol is often sold in aerosol cans as a windshield de-icer. Isopropyl alcohol is also used to remove brake fluid traces from hydraulic braking systems, so that the brake fluid (usually DOT 3, DOT 4, or mineral oil) does not contaminate the brake pads, which would result in poor braking.

2007 Ford Edge SEL, Powerstop F/R Brake Kit, TXT LED 6000K Lo & Hi Beams, W16W LED Reverse Bulbs, 3BSpec 2.5w Map Lights, 5W Cree rear dome lights, 5W Cree cargo light, DTBL LED Taillights

If tuned:  Take note of the strategy code as you return to stock (including 3 bar MAP to 2 bar MAP) -> take car in & get it serviced -> check strategy code when you get car back -> have tuner update your tune if the strategy code has changed -> reload tune -> ENJOY!

bee615

Quote from: Airbornemaikai on October 18, 2014, 02:57:13 AM
Hmm. Ok so I did a similar procedure to my front ambers on my explorer. I applied 3 coats of vht and a clear coat. The other day I went out to clean my headlights as I was going to just put my overlays over top of the already tinted ambers, as I started to clean the lights with rubbing alcohol ( I had 90%) it completely removed the niteshades tint as if it were just permanent marker. I am still baffled about this. What really sucks is because I was not expecting this at all I wasn't paying much attention and smeared the paint onto my gorgeous white paint... Now its discolored and I'll be having to hopefully just buff it out to remove it.
Anyway idk what to think. Im curious to know how you applied your 3 coats and then were able to clean it with the rubbing alcohol again before applying the clear coat, maybe the alcohol content?
Oh and I had done this before this write up so I'm not saying its the OPs fault or anything like that, just saw the thread and thought I would chime in.

That's crazy.  How did you remove the VHT if you applied clear coat?  Did you sand through all of the clear before polishing? 

Also, you have to be careful what type of clear coat to use.  If you use a lacquer clear over an enamel paint (such as VHT), if the enamel isn't fully cured it will weaken the bond and make it very easy to strip. 

This may warrant an email to VHT to get their response.
2017 Lincoln MKZ 3.0 TT AWD
2017 Dodge Hellcat Charger - 825 rwhp
(SOLD) 2013 Lincoln MKS AWD w/Ecoboost - Airaid, Livernois Catted Downpipes, Magnaflow catback, 3 bar MAP, SCT Livewire TS, Unleashed tune, TSW wheels

Airbornemaikai

this is what I'mm wondering. Which is also why I asked how you were able to use alcohol to clean the vht before applying the clear coat (its in your steps). My guess is it has to be the 90% alcohol that I used
2014 Explorer Sport
LMS 91 Tune with 3 Bar Map
160º Evenflo T-stat, 0.30 Motorcraft plugs
LMS DP W/HI-Flow Cats, LMS Corsa Cat-Back
Airaid 401-260

sunwolf

Everything listed in that MSDS is a solvent except for the chromium. Chromium is most likely a catalyst to accelerate the cure of whatever polymer is in solution. The MSDS does not list the actual polymer chemistry but judging by the solvents used I would say it is most likely a polyurethane which will be polar and aromatic. I would let the paint cure then use an IPA water mix below 50% IPA to be safe. Also test the paint and solvent on something else before you go and ruin your tail lights.
2014 Taurus SHO Black Performance Pack LMS tune 3bar tstat downpipes
2008 BMW M6 Convertible SMG
2008 F-150 XLT 4x4 5.4L
2011 F-150 Ecoboost Crew Cab 4x4
2012 Lincoln Navigator L 4x4

bee615

Easiest way to strip the VHT is to use carb cleaner which is a mix of acetone and toluene, hence it's most likely only subject to organic and polar aprotic solvents.  Therefore any concentration of alcohol, which is a polar protic solvent, should be just fine. 

4 years of Chemical Engineering classes finally paying off.....
2017 Lincoln MKZ 3.0 TT AWD
2017 Dodge Hellcat Charger - 825 rwhp
(SOLD) 2013 Lincoln MKS AWD w/Ecoboost - Airaid, Livernois Catted Downpipes, Magnaflow catback, 3 bar MAP, SCT Livewire TS, Unleashed tune, TSW wheels

SHOdded

Quote from: bee615 on October 31, 2014, 11:18:16 AM
4 years of Chemical Engineering classes finally paying off.....
There ya go!  Fully justified now :D
2007 Ford Edge SEL, Powerstop F/R Brake Kit, TXT LED 6000K Lo & Hi Beams, W16W LED Reverse Bulbs, 3BSpec 2.5w Map Lights, 5W Cree rear dome lights, 5W Cree cargo light, DTBL LED Taillights

If tuned:  Take note of the strategy code as you return to stock (including 3 bar MAP to 2 bar MAP) -> take car in & get it serviced -> check strategy code when you get car back -> have tuner update your tune if the strategy code has changed -> reload tune -> ENJOY!