Okay before I start, this project is not for people who do not like running risks or want things done
quickly.It took around 18-25 hours to complete due to work and issues I ran into so make sure you have enough time to do this. PLEASE PLEASE read all the step and do some research yourself, again this is a lot of work!.
*Its very possible and easy to damage and or ruin your headlights doing this, you have been warned.
**Before you start make sure you have an oven that will fit your headlights, if you don't you'll need a heat gun and a lot of patience. I would almost say that without the oven it is close to impossible to get the headlights separated
You will need
- socket set
- flat head and a small philips screwdrivers
- large oven
- possibly silicone caulking
- razor utility knife
and patience !
Step 1First things first you need to remove your bumper to get to your headlights. Mike has a great how to on this so just follow his post
http://www.ecoboostperformanceforum.com/index.php/topic,521.msg3154.html#msg3154 Step 2So now you have no bumper! Good luck, figure the rest out!....

Alright so set your bumper of to the side in a safe place or prep for other work you want to do with it, time for the lights!
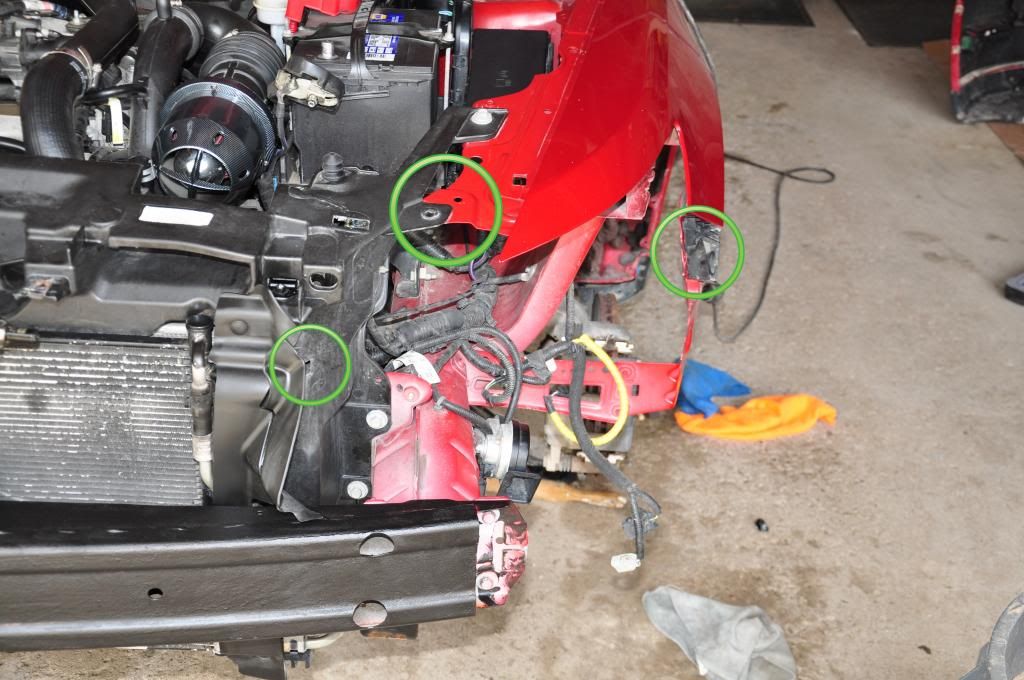
There are 3 bolts and one plastic tab/fastener that holds these bad boys in.
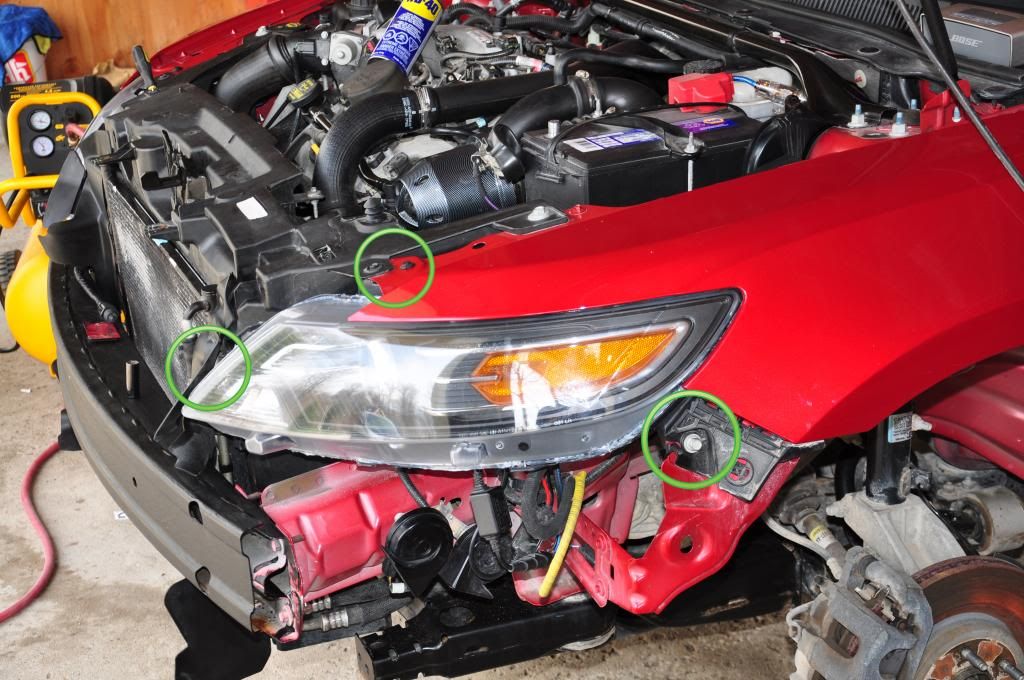
Remove the lights careful to not pull them out too far (you need to remove the 3 light harnesses).
*The headlights may need a slight tug and pull to come off, I find it best to grab the headlight and kinda of shimmy it out side to side
here is a pic with the light out showing the bolt holes
 Step 3
Time for the prep! remove all bulbs from the housing and set off to the side.
Remove the single (ONLY) small screw on the side of the light
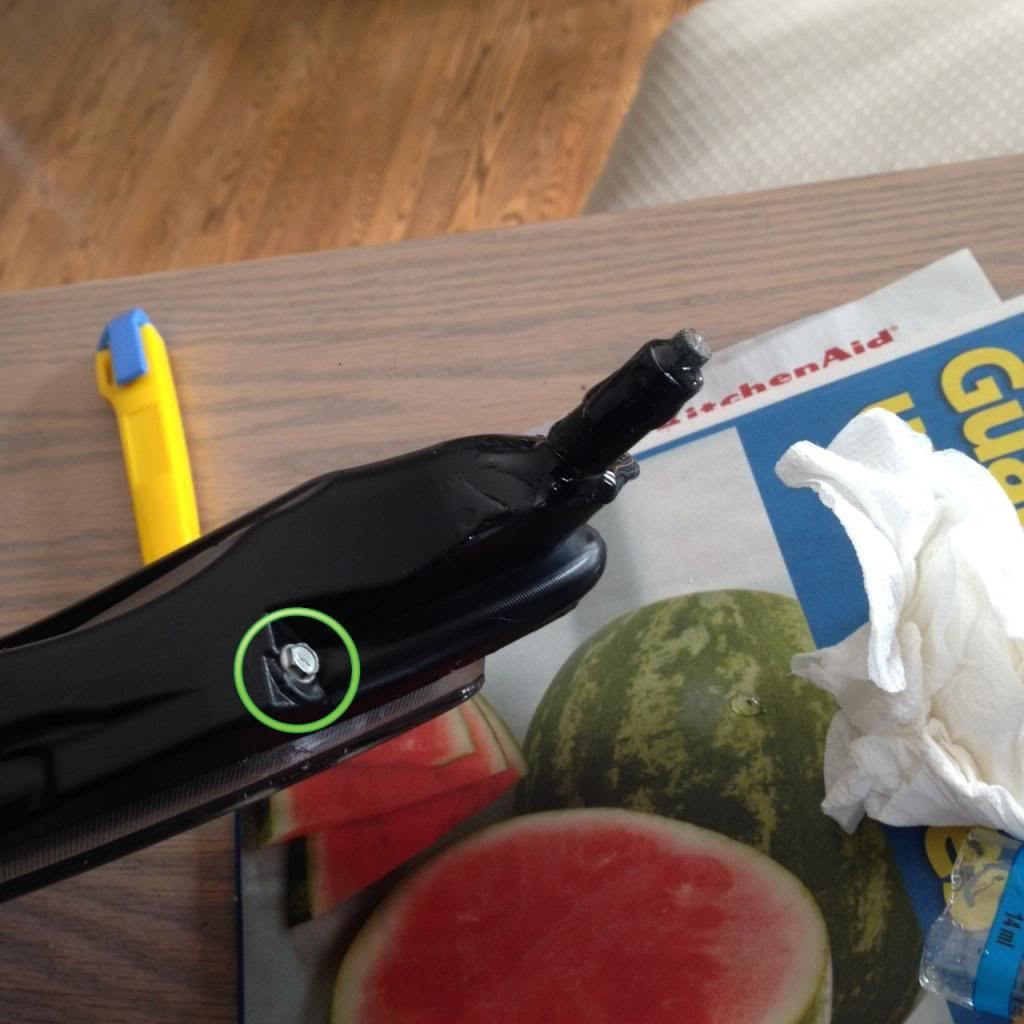
Tape off the holes so no contaminates can get in it will also prevent you from putting your fingers in when you separate the housing from the lens (you dont want to grab any fragile plastic inside)
also tape off the lens to avoid heat damage to the lens (* wont stop if it is baked too long)
Okay so here we are at the point of no return once you start this step you should be fully committed to this mod. Again you can seriously mess things up here which may result in you needing to buy new headlights Step 4Baking time.
Now there are different ways you can do this
1.
220-235'F for
15-20min (I choose this option because I was unsure of the heat on the plastic)
2.
260-270'F for
5-7min ( Probably would do this option if i had to do it again BUT DO TAPE THE LENS)
3.
Heat gun for
Forever ( wouldn't recommend)
once you have chosen you're method of baking throw your headlight in!
Here is a couple of videos to see what your trying to do
TRS Tips: Baking and Opening Headlight Assemblies (sealed with Butyl Rubber) How to Open & Paint Headlights by DECALFX.COMNotesI found that the butyl rubber (glue that is sealing the lights) was very heat resistant and was not very flexible so I had to do a lot of pulling it didn't become gooey like in the videos still, managed to separate them though just made it a bit harder to seal them later.
Also, Our lights have a "stem" on the end for alignment be sure to not melt or brake them as I did with both

if you do you will have to remake them or the headlight will sink into the side of the fender and look like s***
Step 5Get some gloves!
remove the headlights from the heat use a Flathead and or butter knife to pry and separate the lens from the housing. Start in the corner were the signal light is, there large amount of plastic that is not visible when the headlight is on the car so if scratches or cracks a little you cant see it.
Once you have a good separation started get your fingers in there and pull apart (make sure the tabs holding the lens in are pulled away *they should be soft from the heat and easily flexible)
You will hear some popping and cracking noises just be cautious not to pull to fast or hard, slowly pull and separate with as much force as you need.
If you cant separate them or they are still sealed really well you can repeat
Step 4 just be careful to not over bake your lights and damage them.
Step 6Once your lights are apart you will see that the projector and turning signal are attached to the housing and the plastic and faux chrome are attached to the lens there are about 8 small screws holding them into the lens un-screw them to remove the plastic
* keep the lens clean, you dont want to seal it and have dog/cat/human hair or dust in it!
Step 7Paint! so choose your colour (I'm Canadian!) and what you want to do and paint away
I used plastidip because I could then remove the faux chrome parts of the light without having to tape them off, but doing this can lead to its own problems.
I had to repaint the parts twice because when I was removing the plastidip it would catch and pull the parts I didn't want off . This is where the very sharp razor and steady hand comes in to make the cut/line of where you want the paint to separate.

once painting is complete resemble the lens and painted plastic
Step 7Time to re-seal and weather proof
If you managed to get the buytl glue to become stringy and melt this will be easy for you all you have to do is bake your housing again and press the lens in exact opposite of the way you removed them (start by placing the end in where the screw is and then move your way down to the end you pried open first) then once your confident of the alignment and fitment clamp them closed or use ratchet straps to put pressure on them you can also you vise grips . Make sure the glue has resealed all edges around the lens and housing "essentially air and water tight"
If your headlights are like mine, the glue will have stayed in shape and not become stringy just flexible. so you need to go get yourself some shower/bath grade silicone caulk (clear or black your choice) to reseal and weather proof them. follow the same steps above and try to get the best fit. you may have to remove and or cut away some of the glue for a better fitment once the alignment and fitment is good clamp them closed. silicone the edges all around to create a seal and let them dry
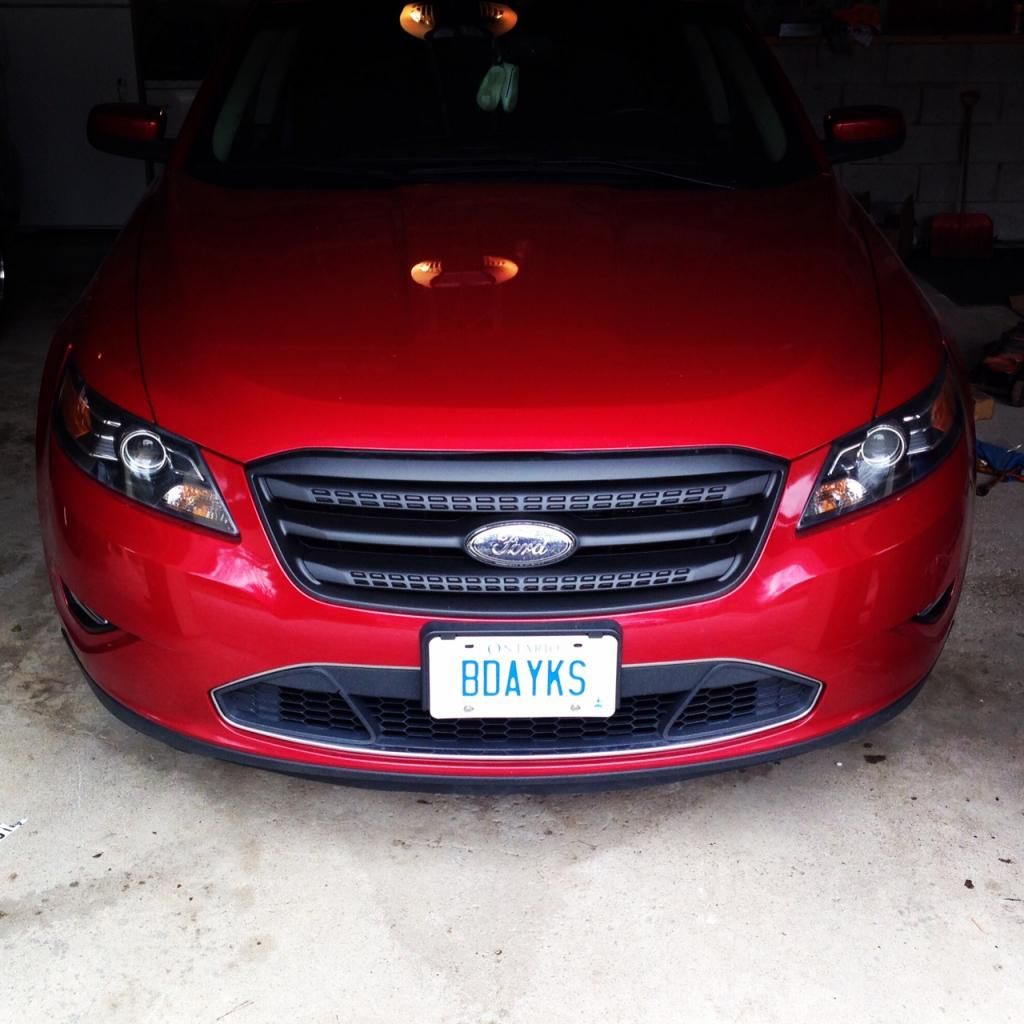
Step 8 Reinstall lights and bumper get a chair with your favorite beverage and look at the fine work you just completed!
I hope this is easy to follow, first how-to! Good luck with your projects!

