Originally posted by Kolk1 DIY: Front pads and Rotors
#1
03-19-2013, 02:03 PM
Not sure if its on here already, but I like to take pics, and talk about what I did today, so either way here it is. lol
I only did my fronts, and I had 0 issues with my old brakes to begin with and the pads still looked new, But I wanted better, So I just had my front rotors turned, but they said they were straight and didnt need it, and basically just deglazed and cleaned the surface.
I went with Red Stuff EBC pads. Found them for about $55 plus shipping, BUT It took 2 weeks for them to show up, I ordered them on the 5th, and they showed up yesterday. I will not order again from THMotorsports or something like that, no tracking number, wouldnt return emails, nothing. But anyway...
Parts I used to do brake pads:
17MM Open end wrench for caliper bolts.
19MM To remove lug nuts.
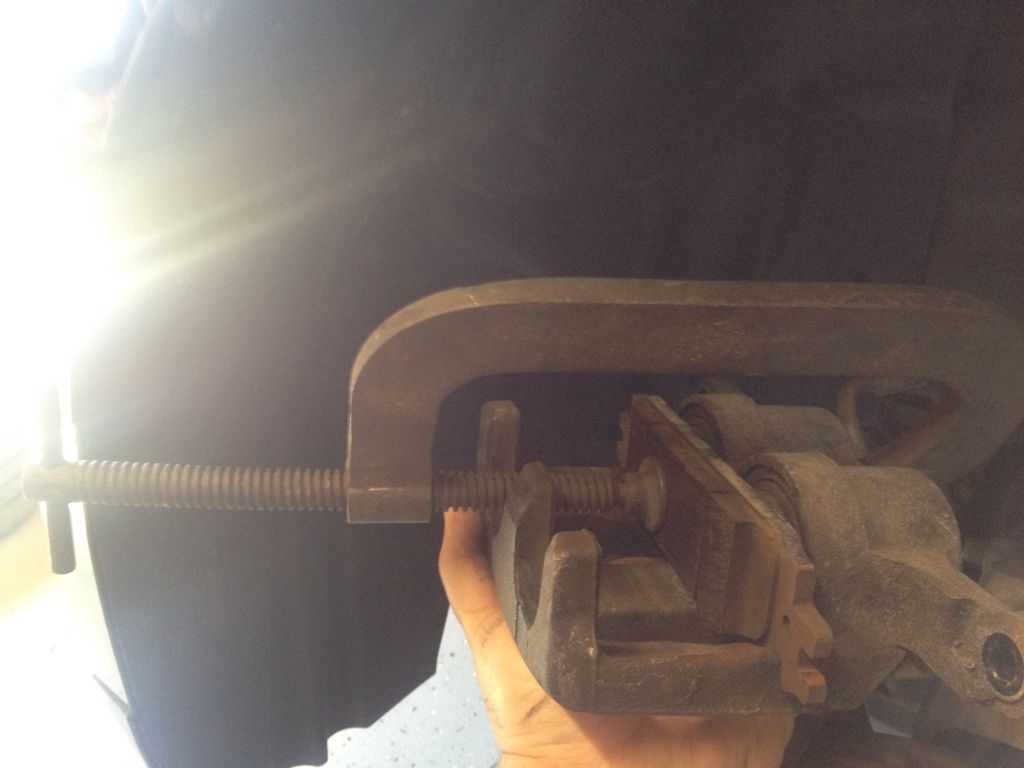
C Clamp to compress caliper a tiny bit.
Obviously Jack and Jack Stands.
Additional to take off Rotors:
T40 Torx bit
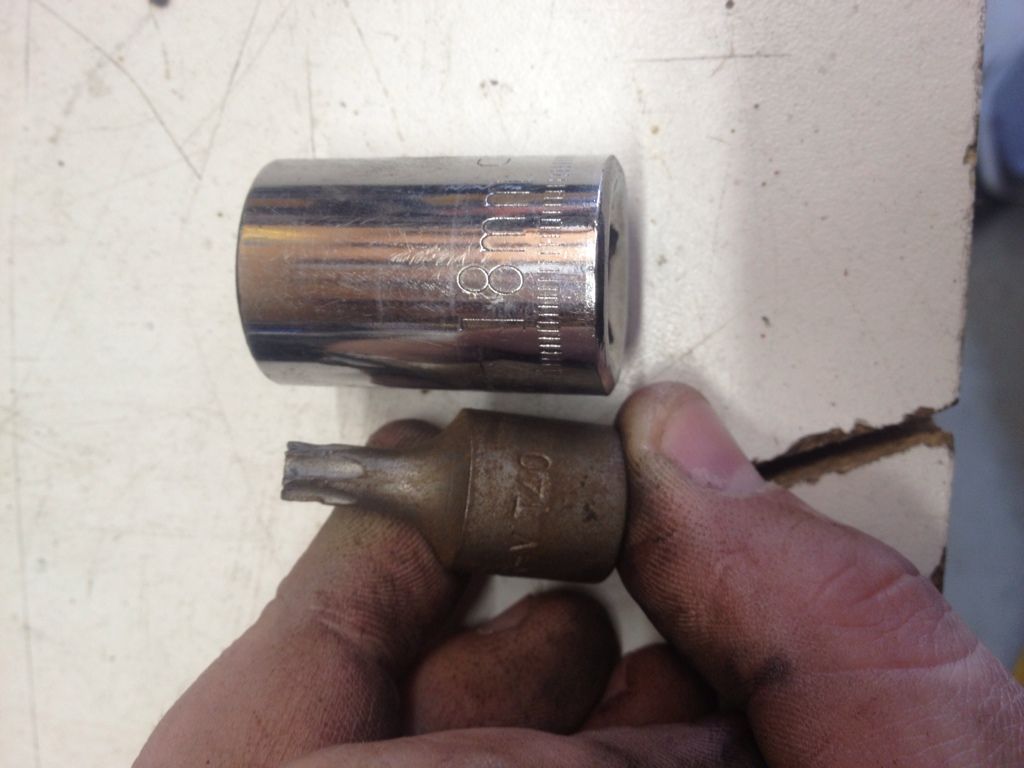
18MM socket.
Total job took me less than 1 hour.
1) Jack up car and remove wheel.
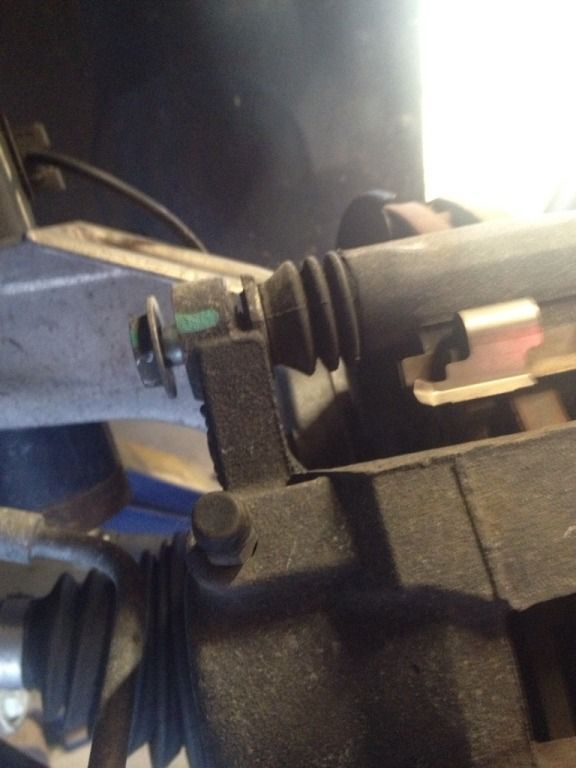
2) At that point look at the backside of the Caliper, you will see 2 bolts, one at the very top, one at the very bottom, Use a 17mm socket or wrench to completely remove these 2 bolts.
Bottom bolt only half way out for photo, normally just remove completely:
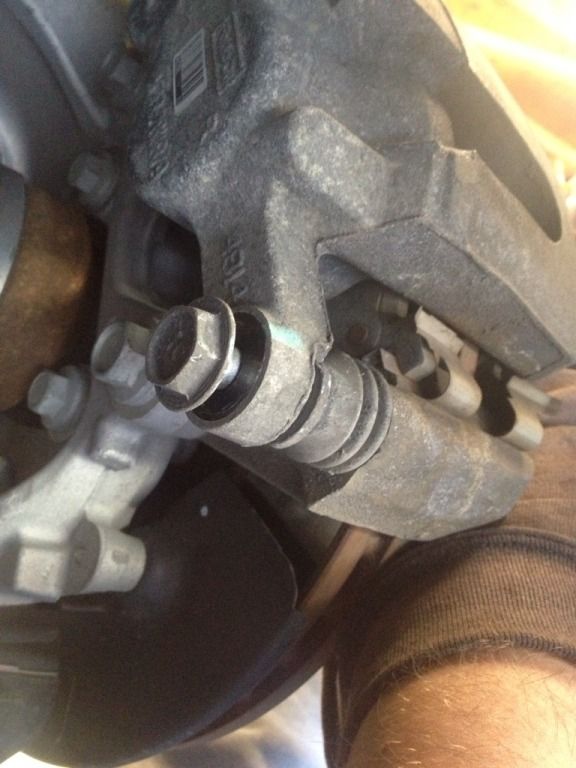
Top bolt only half way out for photo, normally just remove completely:
At this point, the main part of the caliper will come off. NEVER TOUCH THE BRAKE PEDAL WHILE A CALIPER IS REMOVED!! Dont twist or kink the brake line at all, I just gently set it on top of the rotor for the time being
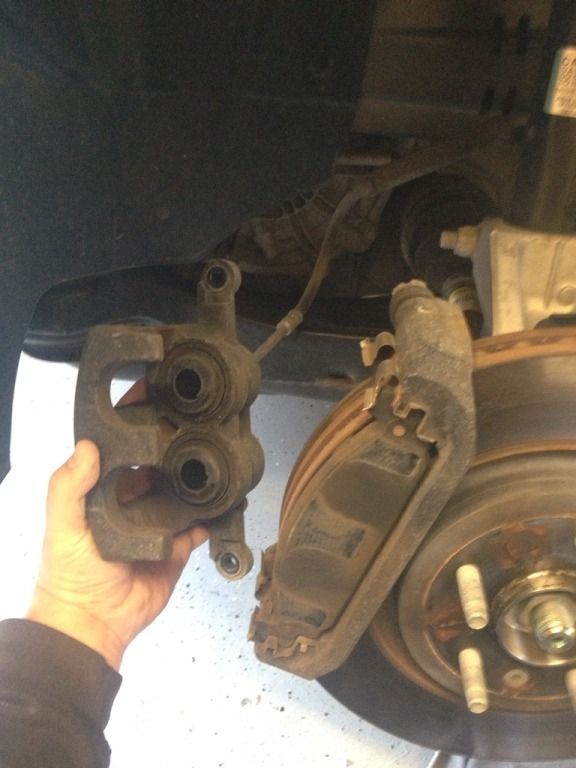
The pads at this point will just slide out of the sides of the remaining bracket:
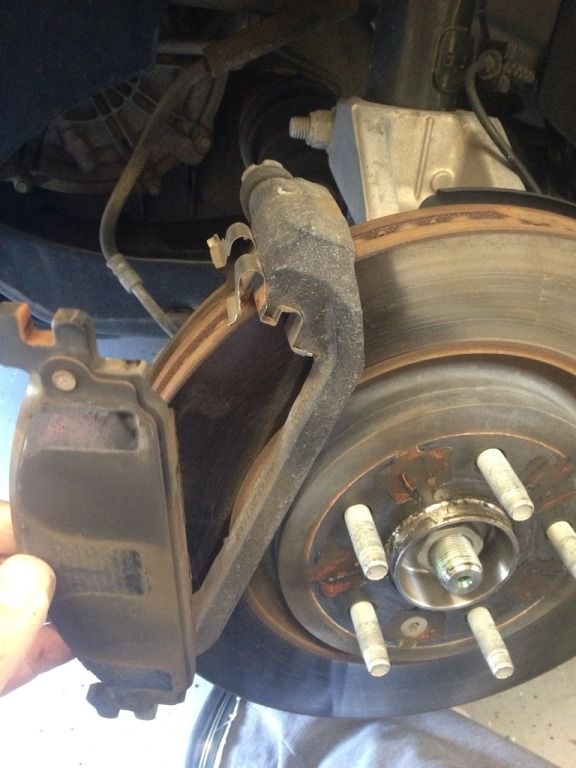
Then I used one of the OLD brake pads, put it back inside of the caliper, and used a C clamp to slightly compress the caliper. Keep the C clamp as centered as possible, and when tightening, go a tiny bit, wait a second, then go a tiny bit more, dont try and use extreme force to push the caliper fluid back into the brake system, if you wait 1 second between 1/4 turns, it will go smoother. I also test very frequently, so Im only compressing the caliper the minimum needed to fit over the new brakes.
I didnt take a pic of removing the rotors, but each rotor has a T40 screw on the face of the rotor, and 2 18mm bolts on the back. Pretty self explanatory, but heres the tools I used for that part lol
I also used anti squeal grease on the back of the new pads.
Installation is obviously the reverse of removal. Once everything is reinstalled, and ready to drive, the brakes will need to be pumped a couple times since you had to compress the calipers, this is normal, but once pumped, You shouldnt have to ever pump them again, if so, you might have a fluid leak somewhere. I did a quick little test drive for about 10 minutes, EBC pads do have a break in period, so follow that if you want, or not if you feel you know better than they do. lol
Im not saying my way is right or the best way, but thats how I did it, and Ive done a ton of breaks and never had an issue. I take no remorse if you mess up your car. lol
Last edited by Kolk1; 03-19-2013, 02:58 PM.
03-19-2013, 02:56 PM
Yes, those 2 bolts had to be completely removed, for pics, I only had them halfway removed so you can tell which ones I was talking about.
As part of step 2, I mention that the 17mm bolts had to be removed, but yea due to how I took the pics, its a little confusing. ill see if I can retype that part.
Yes, most of my Torx bits have seen better days. Some have been cut and refiled so I could still use them, after they get twisted too bad. lol
Edited post, should be more clear now.
Last edited by Kolk1; 03-19-2013, 02:59 PM.

